Showing posts with label Life Hacks. Show all posts

Tuesday, 23 April 2013

Life Hacks Episode 3

Well here we are again at another episode of Life Hacks. In this series I give you a heap of quick and easy tips designed to make your life just a little bit quicker and easier. If you are the kind of person who still types www at the beginning of every web address you visit, then pay attention because this series is for you. (Little side note and nothing to do with today's episode, stop typing www at the beginning of every web address, seriously you just wasted 3 seconds of your life by doing that. You'll get to exactly the same place if you just start typing the address after the www. Go ahead and try it, I'll stand here and wait for you.)


For episode 2 click here

Now today's life hack is something that I know everyone has to deal with, and that is preventing clogged drains in your kitchen. Thanks to our laziness, most of us just tip every little bit of fatty, dirty, food infested water straight down the sink, and then curse our stupid plumbing when it all comes flowing back into the sink after you turn the tap on full.

I told you you can't flush an entire pumpkin down the sink!

Now there are many ways that you can actually prevent all that nasty fatty scrappy gunk from being washed down your sink. You can always tip fluids out into the garden, or go out and buy a tiny strainer for your sink, or you could use something that you probably already have in your kitchen and are about to use to scrub out your pot anyway. 

So to safely empty a dirty pot of crud into your sink without blocking your drain, you will need the following

1 pot full of scummy water (or a whole sink full of dirty dish water)
1 steel wool
1 rubbish bin

Now I Googled steel wool before I wrote this because I'm never sure if these life hacks will translate into other countries, but I'm very happy to find out that Australia isn't the only country that sells steel wool. So way to go the rest of the world, you can do this too! However the type of steel wool you use may end up producing different results, I have used a very coarse steel wool that is already well loved, so there is plenty of room for the water to drain out of it while the scum and crud stays put.


So to save your drain and your sanity, plug up your drain with a piece of steel wool BEFORE you start emptying the water out. If you are emptying a pot, this is simple, just plug up the hole. If you are doing this while the sink is already full of water, it is still simple, just make sure you use two hands, one to pull the plug out, the other to jam the steel wool into the drain hole.

Voila! one plugged up sink hole, and a perfectly timed drop of water splashing into the sink. How awesome is that?

Note that I have taken a photo before anything is tipped down the sink, because truly that is a nasty sight. Once you have emptied all the water, take the steel wool over to your rubbish bin and shake all the crap out into the bin where it belongs. If you are a squeamish person who can't stand the thought of actually touching a dirty scrubber feel free to use gloves while you do this, or even better find someone else to do it for you. 

The beauty of emptying out water in this manner is that while it saves you from having to unclog your drain in the future, it also helps keep our waterways cleaner and reduces the amount of work that water treatment plants have to do once your dirty water reaches them. It truly is a green tip you can feel good about doing it.

Well there you have it, another short cut for you done and dusted. I'll be back again tomorrow with our next episode of Spotlight on Mental health, and for once it isn't a family member i begged to write something for me so be sure to tune in tomorrow for that. 

Tuesday, 16 April 2013

Life Hacks Episode 2

I would like to start todays post by expressing my sorrow at the tragedy in Boston today. My thoughts and hearts go out to everyone in who has been affected by this terrifying attack. I am still of two minds whether to even post anything today, but if it is indeed an act of terror as the news reporters are stating, then the best thing to do is go on with our lives and refuse to give in, so with that in mind I would like to welcome all of you to the second episode of Life Hacks.


For episode one click here

Now today I am going to show you guys how to fix something which is the bane of my existence, and something I am sure everyone has had the frustration of dealing with at some point in their lives to date. Scratched CDs.

Pictured: enough scratches to give you a whole head of grey hairs

This one can be fixed with just a few items that can be found in most households, depending on how yellow your teeth are. Intrigued? Keep reading to find out more.

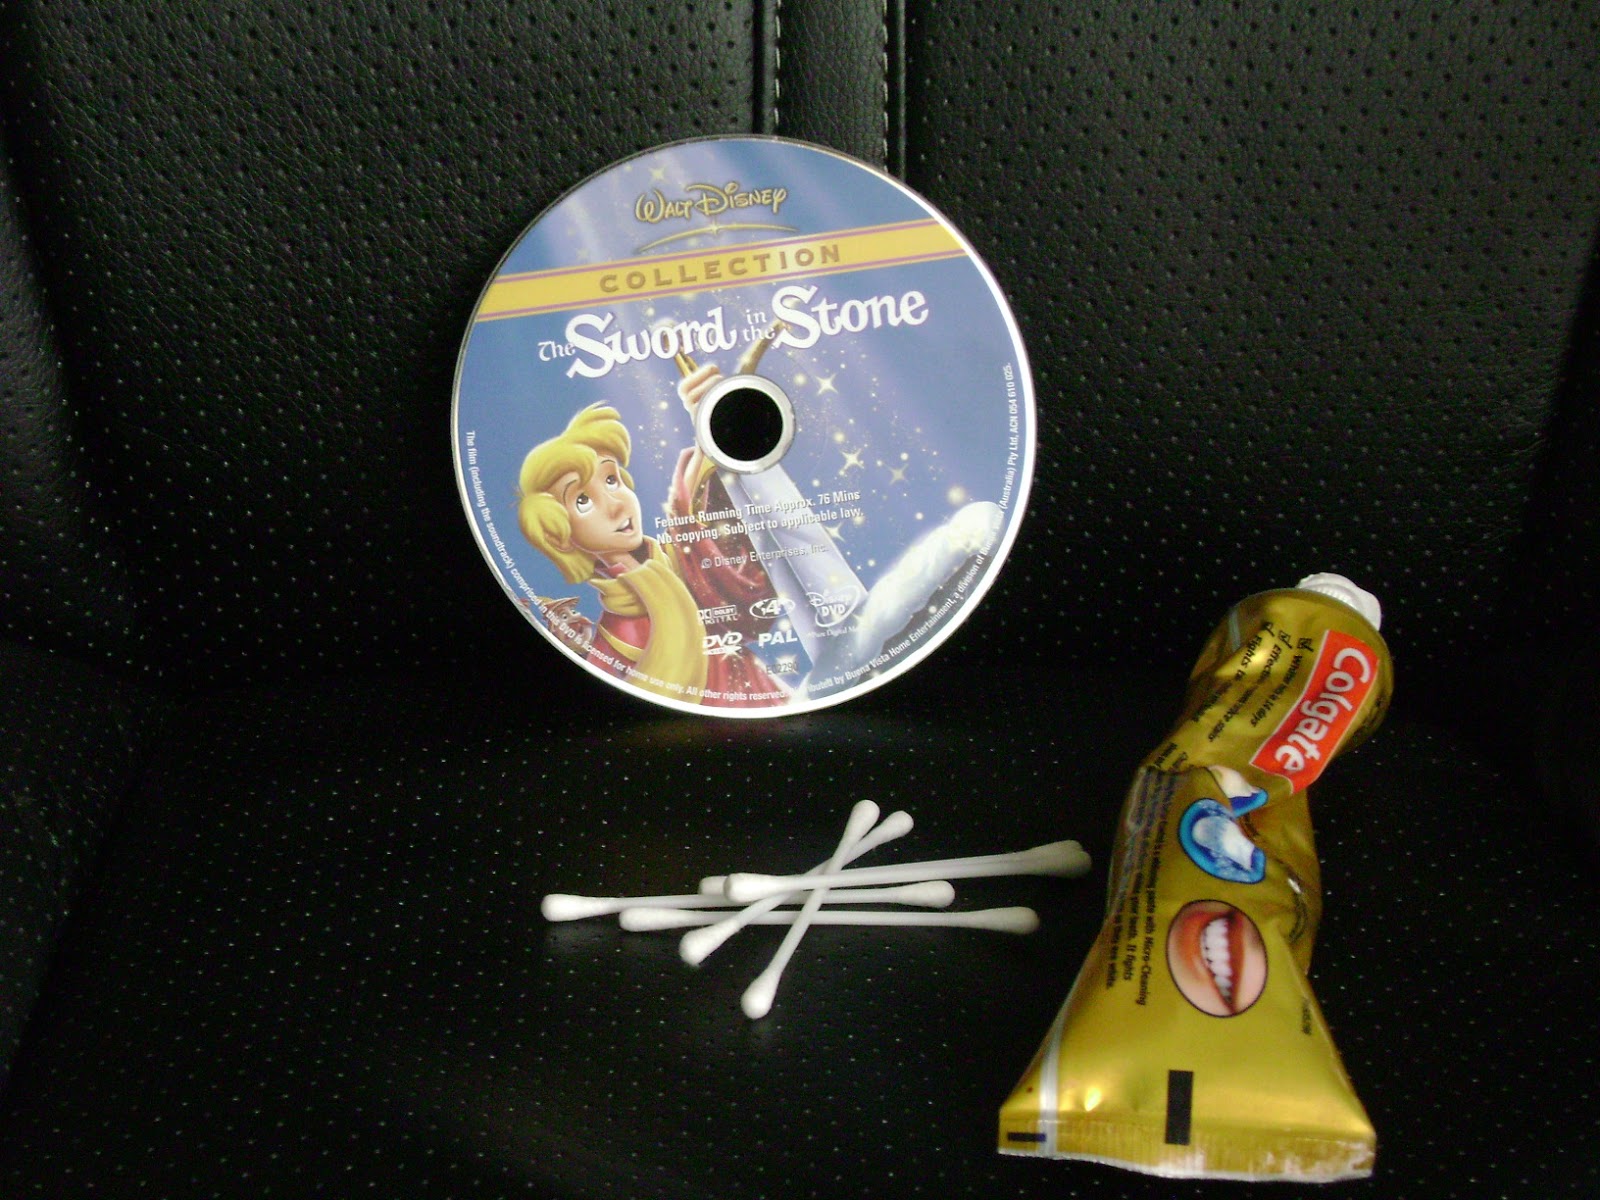
Ok so to repair a scratched CD you will need the following items;

1 scratched CD
Several cotton buds (cotton swabs or Q Tips for my overseas friends)
1 tube of tooth whitening toothpaste with Bi-Carb

Don't judge my choice in movies, or the fact that this one is so well loved. I love me some classic Disney

Now just for a little side note, technically I could send this DVD back to the Disney company in America, and they will replace it for me with a brand new, completely unscratched copy for a minimal fee, but given that I don't feel like mailing my DVDs to America and then waiting weeks and weeks before I can watch The Sword in the Stone again, I'll stick with my method. 

Ok so back to repairing our scratched discs. I mentioned above that the toothpaste has to be whitening toothpaste, and that it must contain Bi-Carbonate Soda. This is important, because it is the Bi-Carb which actually gets rid of the scratch. Why can't you just use plain ol' Bi-Carb? I guess because this way your discs end up with a minty fresh smell once the scratch is repaired. 

So on to repairing the gray-hair inducing scratches. First load up your cotton bud with a small amount of toothpaste. Then start buffing at the scratch, using small circular motions. You will need to buff all the way up and down the scratch in this manner.

Soon this disc will have a sparkly smile and a new lease on life

Now this method can take a little while to complete, depending on how deep the scratch is, but it is important to persevere because it really does work, and can mean the difference between being able to watch a movie, or throwing it into the bin forever. (Although for some movies that may not be a bad thing. I'm looking at you Disaster Movie)

Ok so once you've buffed the scratch rinse the disc under cold water and check your progress. Again if it is a particularly deep scratch, you may need to repeat the above step several times.


Don't forget to rinse with mouthwash to kill the 99% of germs found in your mouth.

Now one other thing I must mention before you fly into a panic when you see it is the micro scratches. Because Bi-Carb is an abrasive, this method will leave a cloudy patch of micro scratches on your disc once you have removed the initial scratch. While this patch is not pleasing to the eye, it does not affect the ability of the disc to play, unlike the massive scratch you started off with. I tried to take a picture of the CD I just cleaned, just so you could get an idea of what it would look like, but evening light plus reflective surface plus terrible photographer do not make for a very clear image. 

Hopefully pointing it out to you makes it a little easier to see it past the blur and flash.

And there you have it. One way to rescue your CDs and DVDs from extinction. 

Well that is all for now, as you can tell I have a lot more scratches in this disc to buff out if I am going to get to watch it before bed tonight, so I'll leave you until tomorrow where we return for another Spotlight on Mental Health. Until then, stay awesome.

*Edit* I have since discovered that car wax may be able to do the same thing. Is anyone willing to test this for me??

Tuesday, 9 April 2013

Life Hacks Episode 1

Welcome back my fellow nutters, and please welcome the newest change to this blog. I have felt for a little while that my blog was starting to wander aimlessly through the wilderness that is blogging for fun and profit. The longer I do this, the more I realise I really am a teeny tiny fish in a massive pond. I am part of the audience to some of the most talented and brilliant writers the internet could possibly offer, and then there's this blog, which sometimes feels like the internet's version of that special child who sits in the corner of the yard stuffing berries up his nose.

I think my biggest problem is my title. It somehow implies that I am looking for ways to make myself sane again, so why am I not sharing them with you guys?? So today is the first episode in another new series called Life Hacks 101. And like all poorly thought out and quickly implemented ideas, it even comes with its own banner.


For anyone who doesn't know what a life hack is, it's basically just a short cut to doing something quicker, easier and in most cases cheaper than what was once done. Once upon a time this segment would have just been called life shortcuts 101, but these days unless you make something sound really technological, people just don't seem to be interested.

In this series I will teach you about a heap of shortcuts I have discovered over the years that make my life just that tiny bit easier. Some of these may already be common knowledge to a lot of you. But there is always someone somewhere who doesn't know everything that you do, so this segment is really for you. 

So todays life hack is a source of much frustration in my life, broken zip handles. For some reason whoever invented zippers forgot to ensure that the zip handle never fell off. Either that or I am super rough on my zips. If you were still able to open and close a zip without that little tab there this would not be a problem, but a lot of the times the loss of this tiny little flap of plastic or metal means the end of that zipper. Luckily for me this one is super easy to fix with the aid of something we all have plenty of in the house. Keychains. 

That's right, all you need to do is insert a keychain into the hole that the zipper tab has left behind and your zip has a new lease of life. Just make sure it isn't a keychain that you actually use or you'll have a bit of explaining to do about the new accessory now dangling from your car's ignition. In my case the new accessory is actually a couch cover.

At least I can now say I was using upholstery as a key accessory before it was cool.

As you can see from the dark stains on this couch cover, it needed to be removed, as I can't fit an entire couch in the washing machine. But thanks to my trusty old life hack, I was able to remove the cover with a minimum of swearing and scissors, and the couch now looks brand new again.

Well that's me done for the evening, Miss K is demanding I entertain her, so I'm off to go watch her jump around the play room like a loon. Stay awesome everyone.


Related Posts Plugin for WordPress, Blogger...